Key Takeaway: Understand what DS-160 is, the online Non-Immigrant Visa application form, which is the first step to applying for any non-immigrant visa to the US. It provides the US Department of State with all the essential personal information required to determine an applicant’s eligibility.

What is the DS-160 form?
DS-160 form is the first step to applying for any non-immigrant visa to the US. It is filled and submitted electronically to the US Department of State on its Consular Electronic Application Center website.
Any forms submitted to the Department of State start with DS.
The form collects detailed biographical information about yourself, including personal, work, and education. This information is used by the Consular Officers, combined with an interview conducted at the Consulates, to process your visa.
So you must carefully give all correct and complete information while filling out the form. Otherwise, you will have to edit the form, and there are chances that you will have to reschedule the visa appointment.
Who should fill out the DS-160 form?
If you want a temporary US visa, then you should do it yourself!
All individuals who are applying for a non-immigrant visa, whether as tourists, business persons, students, or workers, need to first fill out the DS-160 form. If you are going as a family, each member, including a child, needs a separately filled DS-160 form.
Any person who is 16 years or younger or is unable to fill their form by themselves physically can take the help of a third party. The information about the same must be included before they “Sign and Submit” the form.
Now since you are going to do it yourself, you will want to see how it is done.
How do you fill out the DS 160 Form?
The DS-160 form can take a while to fill out. The approximate time to fill out the entire application is 90 minutes.
However, you need not do it at a stretch; an application once started can be saved at whatever stage you wish to stop and then retrieved later at your convenience. I will tell you how it can be done as I explain the step-by-step process.
Also, when are filling out the form, if you have left the page idle for a while, the session expires, and you will be logged out. You have to save your work at every stage so that you will not have to repeat the work.
When you start an application, you will get the application number. Save this number someplace safe. You will need it later.
Before you fill out the form, keep the following documents or information ready by your side:
- Your passport
- History of your education and work. You will need the dates, tenures, and employer details.
- National ID number issued by your home country
- SSN issued by the US if applicable to you.
- Information about your point of contact in the US, the address you will be visiting, and so on.
Got them handy? Now you are good to begin!
Steps to fill out the DS-160 form
You can start the application by going to the site: https://ceac.state.gov/genniv/. A digital photo is not required in the application for applicants from India.
1. Getting Started
The page you will be beginning with looks like the image below:
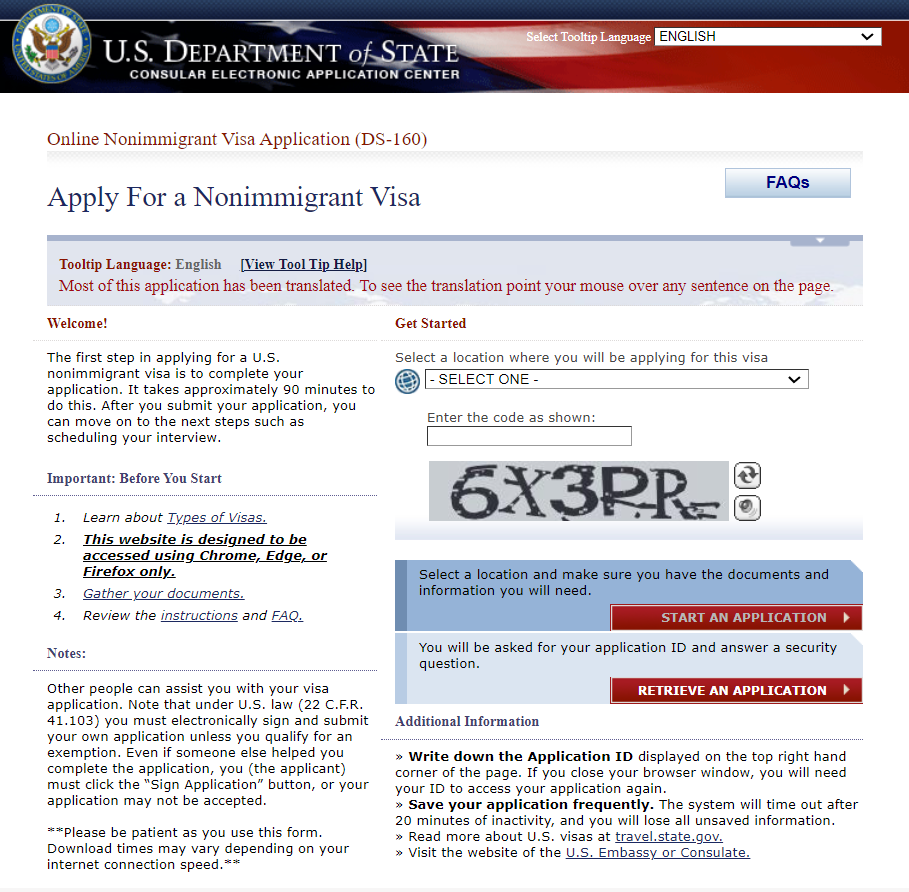
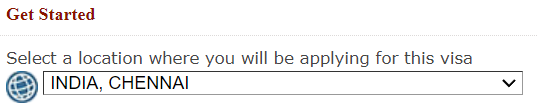
You start with the “Select a location where you will be applying for this visa. The drop list shows you countries and the different cities where the consulates are located.
For example, India has consulates in Chennai, Mumbai, Hyderabad, Delhi, and Kolkata. Your option will look like this:
You can then verify the Captcha. Only after you do this you will see that the “Start an application” tab is activated. Click on it.
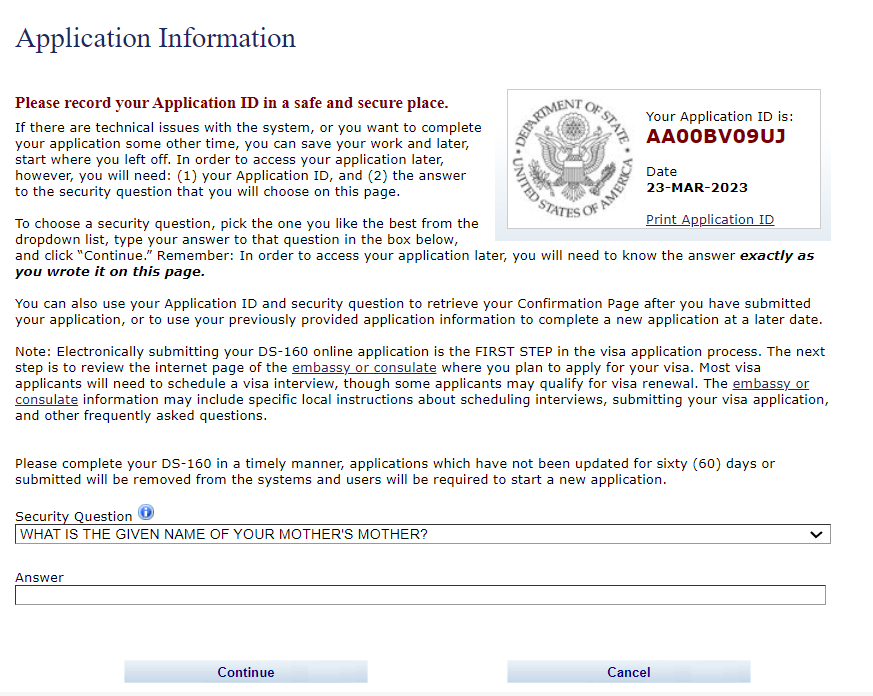
2. Start an application.
Save this application ID. The ID can be used to Retrieve the application if you face any technical problems while you are filling out the form, or when your session has timed out, or when you want to get back to your application in case you exit midway.
You will see Computer Fraud and Abuse Act Notices and some disclaimers below which you click on “I agree.”
As you scroll down, you can see the following Application information. Save the Application ID somewhere safe. Answer your chosen security question. You need both to access the application in the future.
3. Personal Information:
This includes basic information about yourself, like name, date of birth, marital status, nationality, and so on. If you have lived in the US before, you need to give the details of your former social security number in the US. Otherwise, you can simply choose the “does not apply” option. Further, you need to add your contact details like home and work addresses, phone numbers, email ID, and so on.
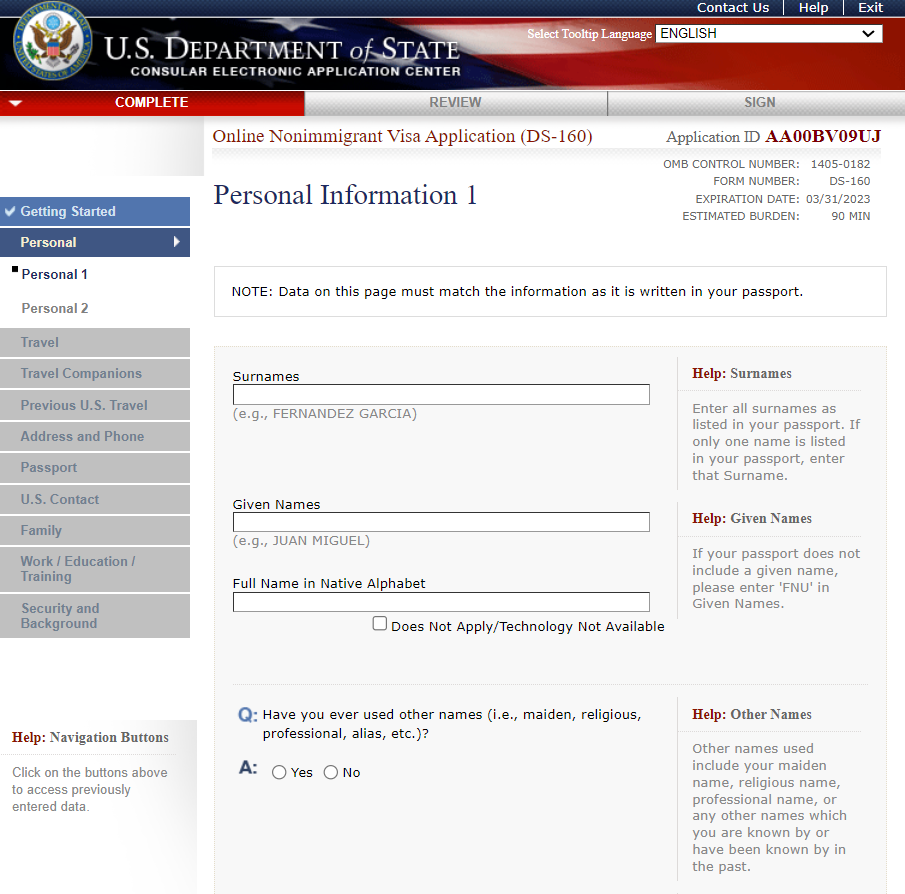
Enter your name exactly as it is mentioned in your passport. All the information that follows is self-explanatory.
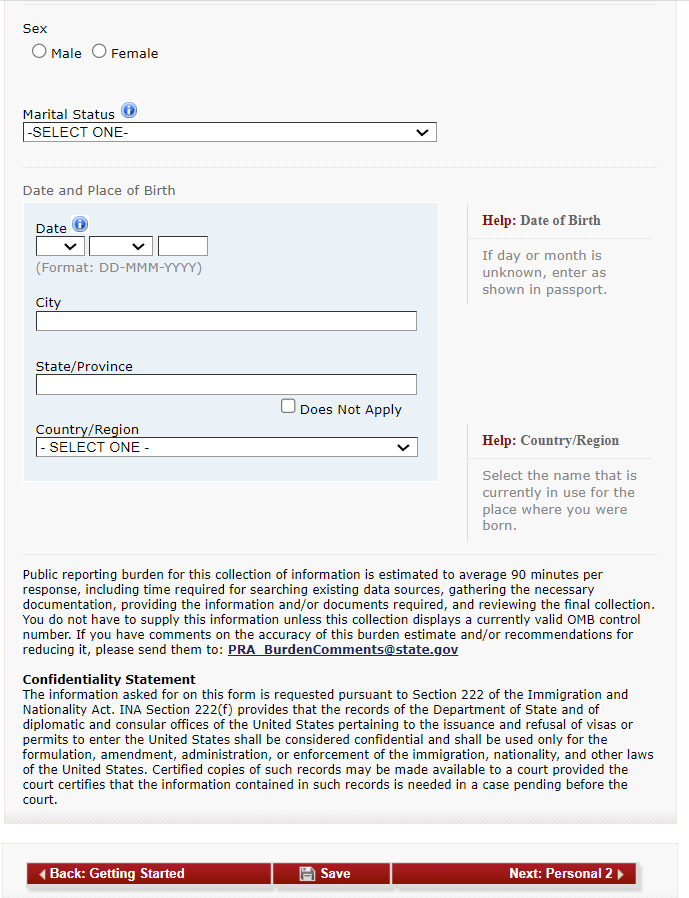
Click on Save and continue to the Personal Information Page 2.
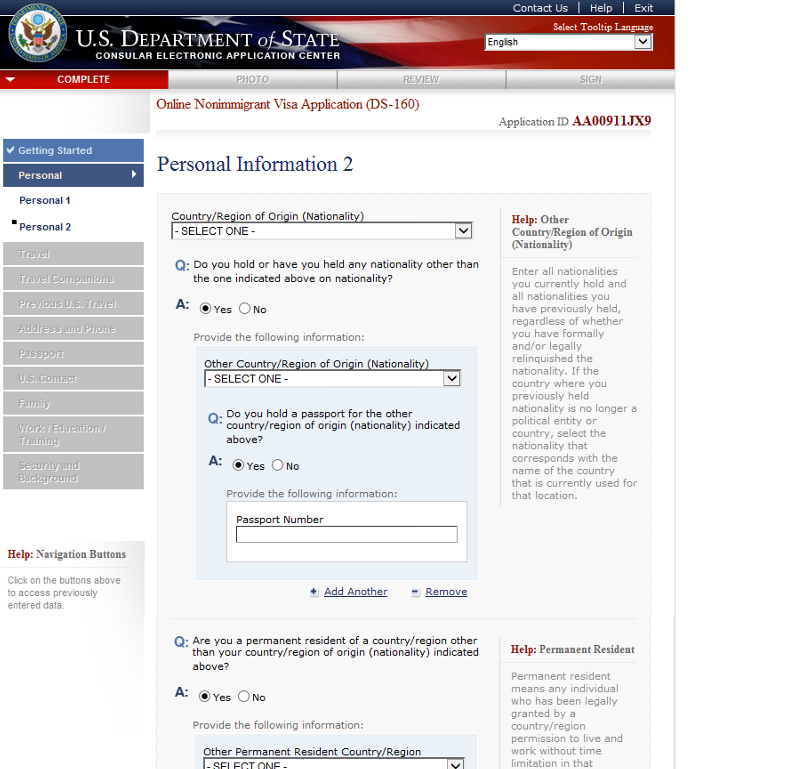
4. Personal Information 2:
The second page of Personal information you will be filling in is about your Nationality, and any information relating to your nationality of any other country, if applicable.
5. Travel Information:
Are you traveling as a visitor, student, for business, or for work? Your visa type depends on that. You must enter the purpose of your US trip and the visa you will require for it.
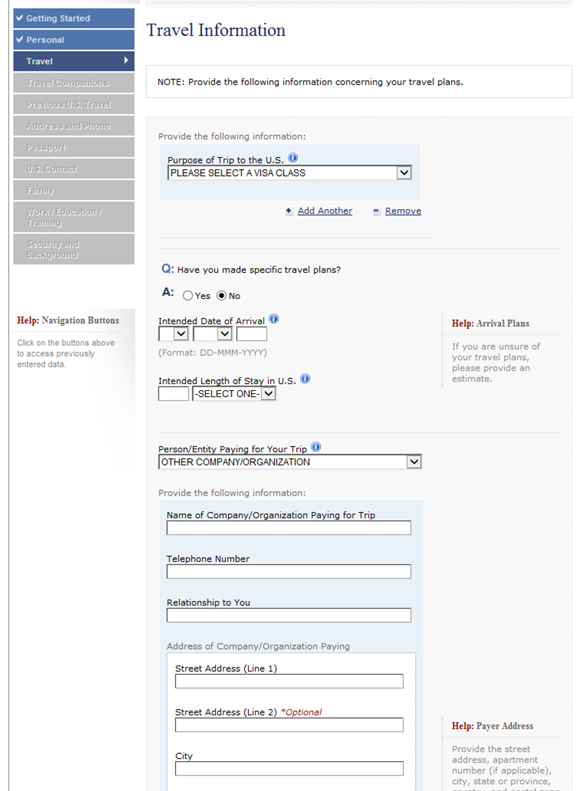
You will also need tentative travel dates when you will be entering and leaving the US. Who is paying for your trip? If it is not yourself, then the details of the person or entity who is sponsoring your trip are required.
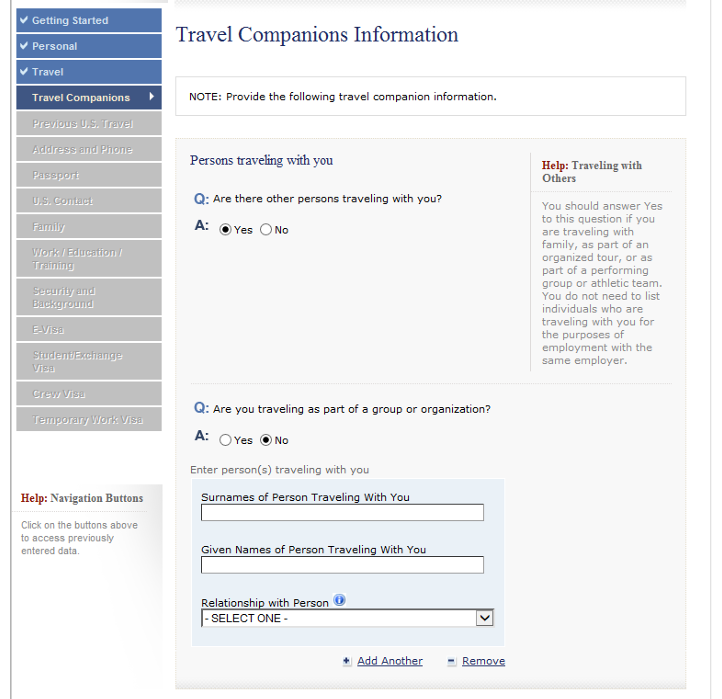
6. Travel Companion information:
The following page requires the details of a travel companion, if any. If yes, then you need to give their names and your relationship with them. You have an option to “Add Another” if there are more people. If there are none, then that is that.
7. Previous US Travel Information
You will then be asked if you have previously traveled to the US or not.
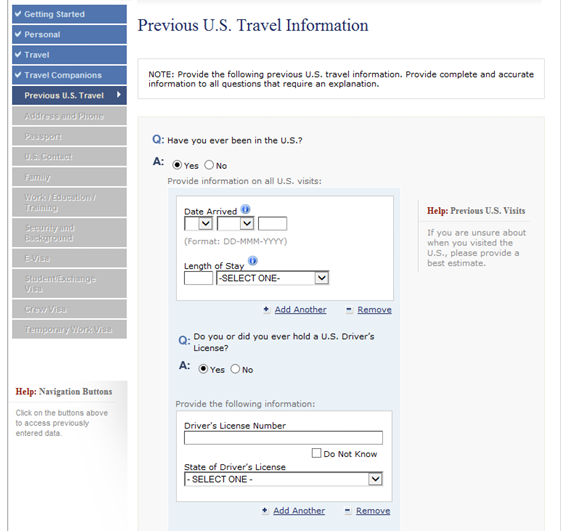
If you did, then you need to add the date of arrival and the duration of your stay. If you were issued a Driver’s license during your previous visit, you must add the number and the issuing state.
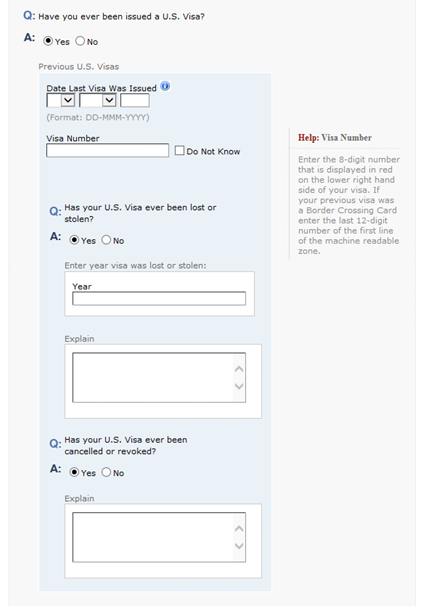
If you were issued a US visa before, you must add the visa number and date of issue. You also need to add information about whether your visa was lost, stolen, canceled, or revoked with an explanation.
That’s not all.
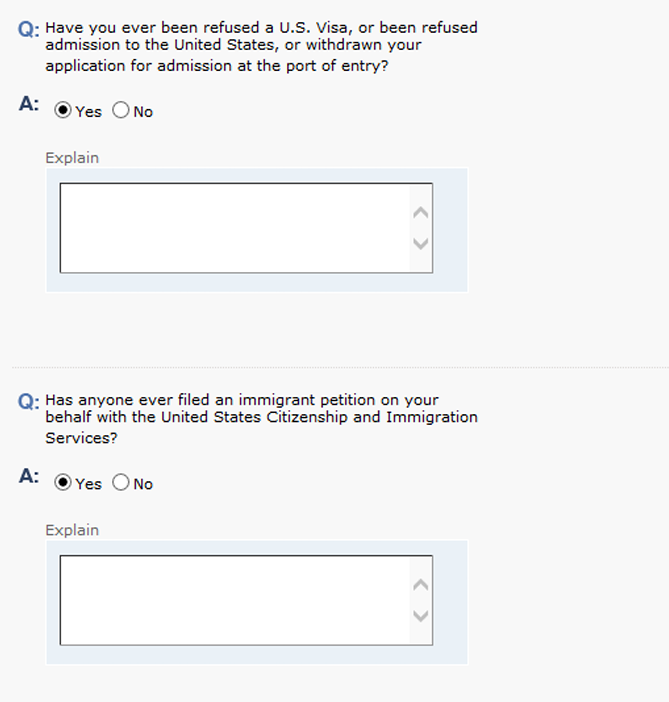
The following questions are whether you were ever refused a visa, refused admission into the United States, or withdrawn your application at the port of entry. You will also have to explain the situation if it exists.
If you or someone on your behalf has ever filed an immigration petition to the United States Citizenship and Immigration Services, you must give that information.
8. Address and Phone Information
The next page offers you fields to add your home address, mailing address, phone number, and a list of social media profiles you hold on different platforms.
9. Passport information
Did you keep your passport handy as I asked you to? You will need it now to add the passport number, the passport book number (if you had more than one passport), the place of issue, state, and country.
You must also mention if your passport was ever lost or stolen and give its details.
10. Point of Contact information in the US
If you are visiting or staying with someone in the US, you need to include those details too, along with your relationship with this person and their address and contact details. It is recommended that you add at least one contact.

11. Family Information:
On this page, you give details of your parents’ name, date of birth, and address. If you have any relatives living in the US, this part of the form requires you to fill them out. You will also be filling in spouse details in the spouse section.
12. Work/Education/Training:
Starting with your current occupation/education/training, you are required to give extensive information, including the name of your employer/institution, address, start date, income, and your role and designation.
This is going to be tedious, no doubt, but necessary. Go on filling them in reverse chronology by clicking Add Another.
This goes on to a couple of more pages, marked as Previous and Additional information.
Additional information asks you questions like whether you belong to any tribe or clan, or whether you traveled to any countries apart from your country of residence, and so on.
13. Security and Background
This section is spread across five pages with Yes or No questions like whether you have been arrested or engaged in any criminal or terrorist activity and the like. If you choose a Yes to any of these questions, you must appear in front of a consular officer.
This concludes all the sections of the DS-160 form. Remember to save every now and then, else you will find the session has expired, and you will have to fill in the unsaved details again.
It is also important to note that the DS-160 form may vary slightly for different types of visas according to the types of information that may be necessary for these visas respectively.
For instance, Student and Exchange visas will require you to give some additional details about the point of contact, the name of the institution you are joining, and other information.
If you are an Indian passport holder, you are not required to upload your photo for the form.
After you have completed all the sections, You get the option to review the form and edit the information on every page.
Review it carefully while taking your time. You will not be able to make any changes once you have submitted the form. You can only start a new application if that happens.
After ensuring everything is correct, you can sign electronically and submit the application. You will also have to mention if someone helped you fill out the form.
You will get a confirmation page as soon as you submit the form. This page is important as it comes with a specific bar code. You must print this confirmation and carry it with you for your visa interview.
How to save, download and print DS-160?
When you have signed and submitted your DS-160, you will see the Confirmation page displaying your basic personal details.
It is followed by three options:
- Print Confirmation
- Print Application
- Email Confirmation
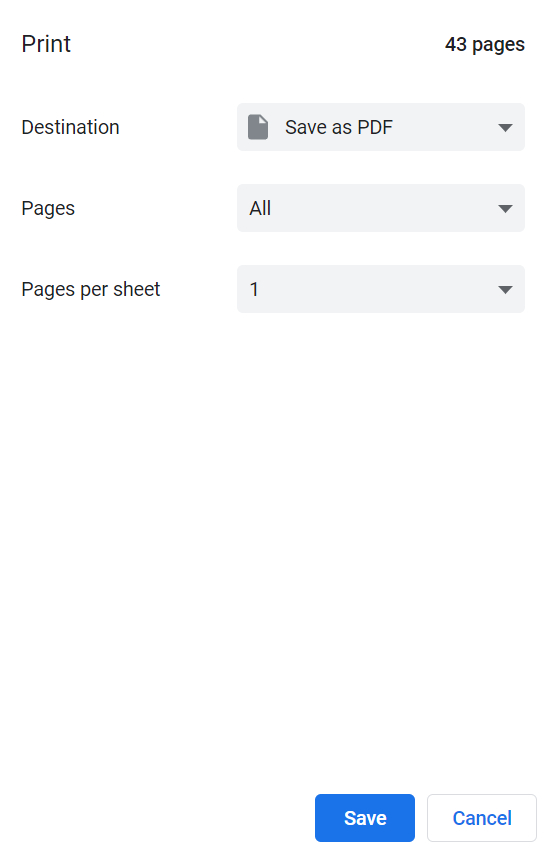
If you want to save the application for your reference, click on Print Application, and when you get the printing window, choose Destination as Save as PDF. This downloads and saves a copy of your DS-160 in your system.
How to change DS-160?
You can change a DS-160 form after submission within 30 days of submission using the following steps.
- Go to the CEAC website page.
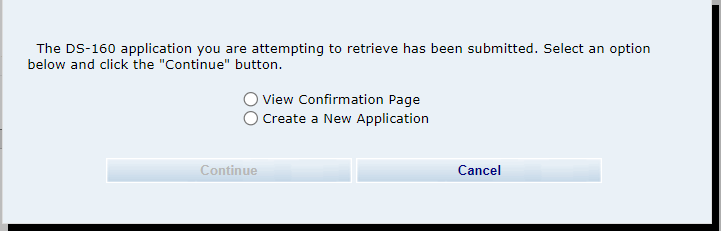
- Click on Retrieve Application.
- Enter the Application number and answer the security question.
- You see the following dialog box open. Click on Create a New Application.
- Make the necessary changes. After you are finished, resubmit it.
- You will get a new confirmation and a new bar code. Remember to use this and not the older one for your visa appointment.
If the 30 days have passed, you must create a fresh new form, submit it, and use the new confirmation page.
So that is done and dusted. Now you must be wondering, okay, so what next?
I’ll tell you.
What to do after you fill out the DS-160 form?
- Print and keep the DS-160 Confirmation Page safely in your file. The entire application is not necessary, but you can keep that for your personal reference.
- Pay the visa application processing fee. The DS-160 form does not need you to pay any fee, but the visa processing does!
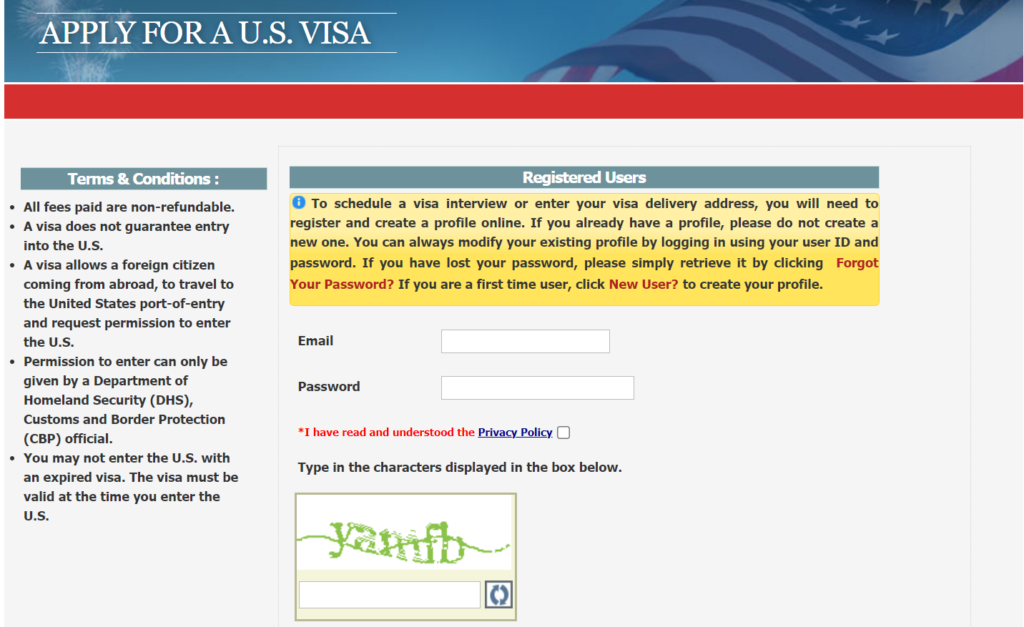
- You need to create a profile on the US Embassy or Consulate website, where you choose your country-specific login page.
- Start as a New User and sign up with your Email id and a password.
- The profile created takes place in a few steps where you give in details of your passport, DS-160 form number, and visa type.
- Schedule a visa interview appointment.
You will be using the same profile to schedule an appointment for your visa interview. You will get the available date options and you can pick what is suitable for you.
Conclusion
I understand this looks tedious and overwhelming!
But it is necessary.
Every applicant, including children, must have a separate form of their own. It is important that you fill in accurate and complete information in the form and be honest about it. If not, you are at risk of being rejected.
I believe I have covered everything you may need to fill out the DS-160 form and I hope it helps you.
Have I missed anything? Let me know in the comments.
FAQ
- Is there a processing time for DS-160?
There is no processing time for DS-160. The confirmation page of the form is submitted for your visa appointment. However, visa processing takes time.
- How long is DS 160 valid?
The DS-160 form is valid for 30 days from the date you start filling it. You must complete it within these 30 days, or you will have to start a new application form if that expires.
- What is the meaning of “session timed out”?
While filling out the form, if you have left the page idle for more than 20 minutes, your session will expire, and you will have to log in again. Any unsaved information in the form may be lost, and you must fill it out again.
It is always safe to record your Application ID somewhere safe so that you can retrieve it in these circumstances.
- How long does it take to fill out the DS-160 form?
The total time taken to fill out the form may depend on each individual. But it may take an hour or more on average.
Read my other articles:
Who is an NRI? Understanding Indians living abroad
How to get an H4 visa? A Simple Step-by-step guide + Checklist